Previously Citrix has a tool called “Project Kensho ver 1.3” which is under experimental to convert Vmware or XenServer to Hyper V VHD. More information about this tool:-
http://community.citrix.com/display/xs/Kensho.
However it no longer available to download from MyCitrix website.
Citrix has included this tool into Citrix XenServer 5.6 and you can use XenCenter to perform import and export appliance. Bear in mind, it is not a conversion tool and may not be 100% working.
Test scenario:-
a) Hyper V Host running Windows Server 2008 R2 with SP1
b) Citrix XenServer 5.6 SP2
c) XenCenter
d) In my simulation lab, i have converted Citrix Virtual Appliance (running Windows Server 2008 R2) & one virtual machine running in Citrix XenServer 5.6 SP2 (Windows Server 2008).
Here is how perform this tasks:-
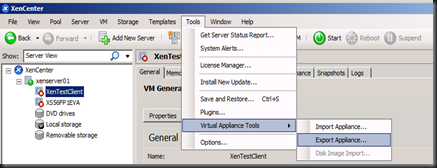
1. To use it, go to XenCenter console. Select Tools | Virtual Appliance Tools | Export Appliance
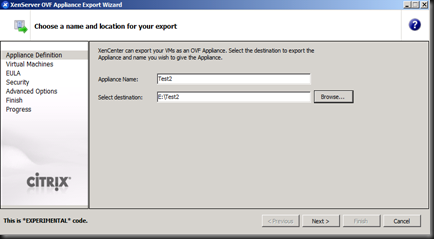
2. Give a name of the export appliance and set the destination
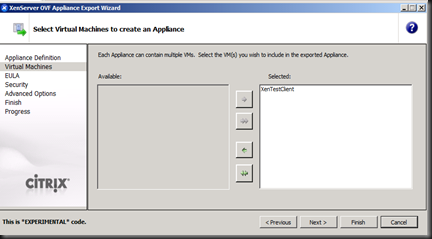
3. Select the VM
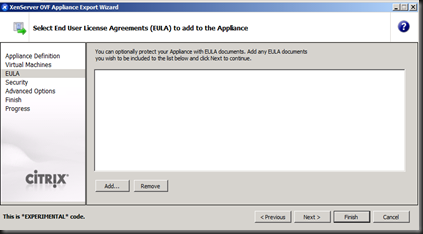
4. On EULA page, just click Next
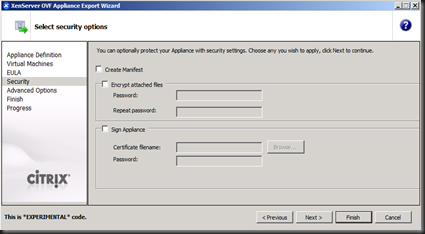
5. On Security options, leave it default and click Finish.
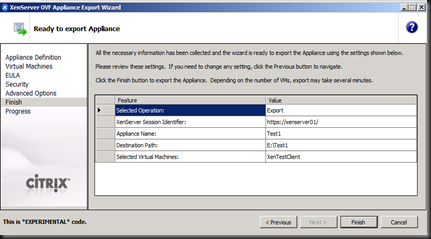
6. On Ready to export Appliance, review the setting and click Finish to start exporting
7. The Export process will take a while.

The final result is a VHD has exported. Copy the VHD to Hyper V Host, create a new VM configuration and assign HDD to the converted VHD.
Final step is start the VM, uninstall Citrix Tool for Virtual Machine and install Hyper V Integration Component. Once done, reboot the VM and you are set to go.
Note: This tool is still under experimental.
However it no longer available to download from MyCitrix website.
Citrix has included this tool into Citrix XenServer 5.6 and you can use XenCenter to perform import and export appliance. Bear in mind, it is not a conversion tool and may not be 100% working.
Test scenario:-
a) Hyper V Host running Windows Server 2008 R2 with SP1
b) Citrix XenServer 5.6 SP2
c) XenCenter
d) In my simulation lab, i have converted Citrix Virtual Appliance (running Windows Server 2008 R2) & one virtual machine running in Citrix XenServer 5.6 SP2 (Windows Server 2008).
Here is how perform this tasks:-
1. To use it, go to XenCenter console. Select Tools | Virtual Appliance Tools | Export Appliance

2. Give a name of the export appliance and set the destination

3. Select the VM

4. On EULA page, just click Next

5. On Security options, leave it default and click Finish.

6. On Ready to export Appliance, review the setting and click Finish to start exporting

7. The Export process will take a while.

The final result is a VHD has exported. Copy the VHD to Hyper V Host, create a new VM configuration and assign HDD to the converted VHD.
Final step is start the VM, uninstall Citrix Tool for Virtual Machine and install Hyper V Integration Component. Once done, reboot the VM and you are set to go.
Note: This tool is still under experimental.