System Center Essential (SCE) is designed for organisations with up to 50 servers and 500 client computers, and combines hardware and software inventory, monitoring, software deployment, patch management and (new in 2010) virtualisation management, as well as comprehensive reporting.
SCE 2010 is a comprehensive IT management for a medium business which used a single domain in their environment.
In order to install SCE 2010, you need at least a minimum
2.0 GHz processor
2 GB of RAM
12 GB of available hard disk space (1 GB on the system drive); 20 GB of available hard disk space for storing updates; 150 GB of available hard disk space if planning virtualization management. So, before installing SCE 2010, several prerequisites have to be met
Microsoft .NET Framework, version 3.5
Microsoft XML Core Services 6.0
Windows Installer 3.1 (included as part of Windows Server 2008)
Microsoft Data Access Components 2.81
Microsoft Management Console 3.0
Internet Information Services, version 6.0 or 7.0
Microsoft ASP.NET 2.0
Microsoft SQL Server Database Services
Microsoft SQL Server Reporting Services
Windows PowerShell 1.0 (included as part of Windows Server 2008)
Windows Remote Management—included as part of Windows Server 2008You can get the pre-requisite component from the extracted SCE files. It is located in the prerequisites folder.
Let start looking at the installation process.
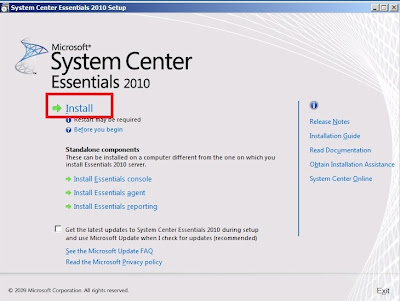
1.Double click SetupSCE.exe and select Install option.
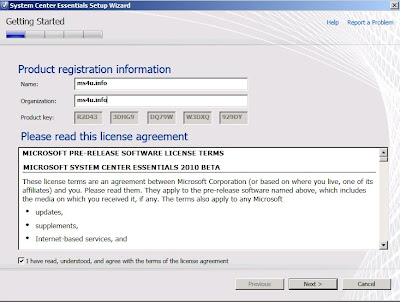
2.Enter product registration information and accept the agreement
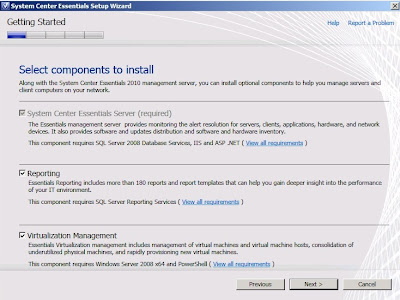
3.Select all component to install. By default, the system select SCE and you can enable Reporting and Virtualization management component.
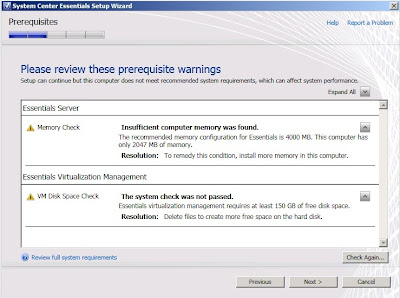
4. The wizard will perform a prerequisite check.
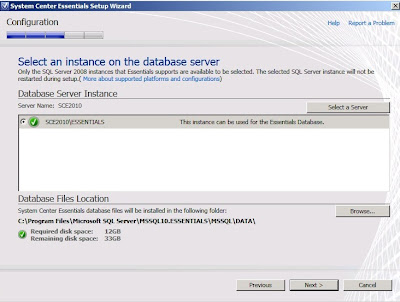
5. Select the instance of the database.I'm have installed SQL Server Express Edition.
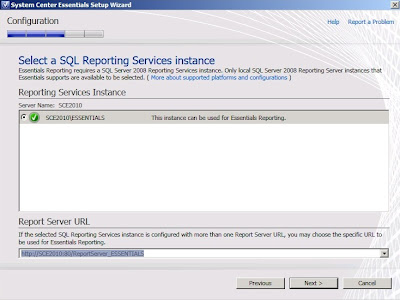
6. Specify the SQL reporting services instance and Report Server URL.
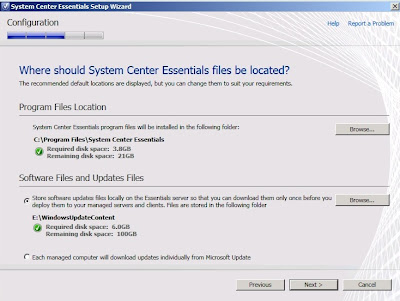
7. Specify the SCE installation program files location and Software Update location.
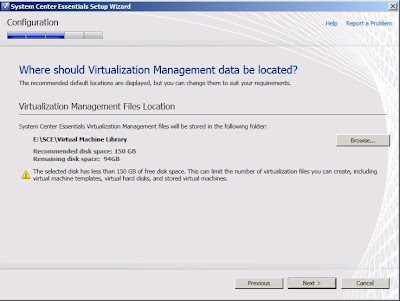
8.Specify the Virtualization management location
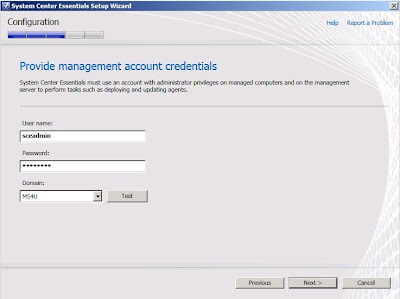
9.Then create a domain admin account "sceadmin" which going to managed computers and management server to perform tasks such as deploying and updating agents. Enter the useraccount "sceadmin" and password. Click Test to check the validity of the user account.
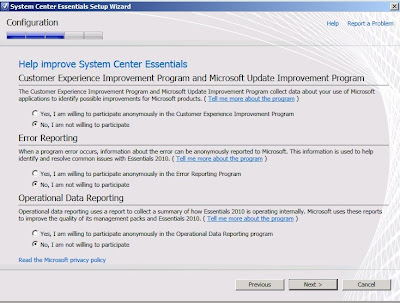
10. On the Help Improve System center Essential. Select No.
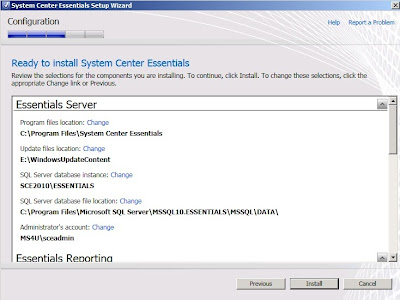
11.Review the setting before click Install.
12. Once complete, the wizard will provide an installation confirmation status.
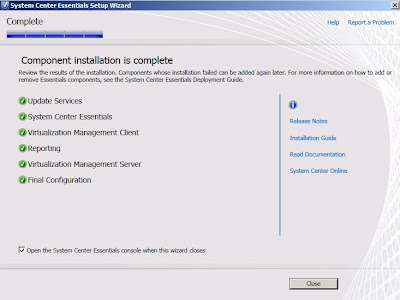
That's concluded the installation process. Click Close to start the SCE initial configuration wizard
SCE 2010 is a comprehensive IT management for a medium business which used a single domain in their environment.
In order to install SCE 2010, you need at least a minimum
2.0 GHz processor
2 GB of RAM
12 GB of available hard disk space (1 GB on the system drive); 20 GB of available hard disk space for storing updates; 150 GB of available hard disk space if planning virtualization management. So, before installing SCE 2010, several prerequisites have to be met
Microsoft .NET Framework, version 3.5
Microsoft XML Core Services 6.0
Windows Installer 3.1 (included as part of Windows Server 2008)
Microsoft Data Access Components 2.81
Microsoft Management Console 3.0
Internet Information Services, version 6.0 or 7.0
Microsoft ASP.NET 2.0
Microsoft SQL Server Database Services
Microsoft SQL Server Reporting Services
Windows PowerShell 1.0 (included as part of Windows Server 2008)
Windows Remote Management—included as part of Windows Server 2008You can get the pre-requisite component from the extracted SCE files. It is located in the prerequisites folder.
Let start looking at the installation process.
1.Double click SetupSCE.exe and select Install option.

2.Enter product registration information and accept the agreement

3.Select all component to install. By default, the system select SCE and you can enable Reporting and Virtualization management component.

4. The wizard will perform a prerequisite check.

5. Select the instance of the database.I'm have installed SQL Server Express Edition.

6. Specify the SQL reporting services instance and Report Server URL.

7. Specify the SCE installation program files location and Software Update location.

8.Specify the Virtualization management location

9.Then create a domain admin account "sceadmin" which going to managed computers and management server to perform tasks such as deploying and updating agents. Enter the useraccount "sceadmin" and password. Click Test to check the validity of the user account.

10. On the Help Improve System center Essential. Select No.

11.Review the setting before click Install.

12. Once complete, the wizard will provide an installation confirmation status.

That's concluded the installation process. Click Close to start the SCE initial configuration wizard