In our previous post we saw the design of the AWS Backup on VMC. In this post we’re going through the implementation steps


As per the design and best practice, we are going to use the ENI for the Backup traffic
CREATE A VPC ENDPOINT
TO CREATE AN INTERFACE ENDPOINT FOR AN AWS SERVICE
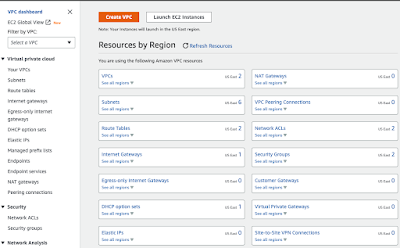
1. Open the Amazon VPC console at https://console.aws.amazon.com/vpc

2. In the navigation pane, choose Endpoints

3. Choose Create endpoint
4. Name the endpoint

5. For Service category, choose AWS services

6. For Service name, search “Backup” and select “backup-gateway” service from the dropdown

7. For VPC, select the VPC which we used for SDDC deployment and extension
8. To create an interface endpoint for Amazon S3, you must “uncheck” Additional settings, Enable DNS name. This is because Amazon S3 does not support private DNS for interface VPC endpoints
9. For Subnets, select one subnet per Availability Zone which we used for SDDC VMC selection

10. For Security group, select the security groups to associate with the endpoint network interfaces. The security group rules must allow Backup resource to communicate with the SDDC MGW/CGW to communicate with the endpoint network interface

11. For Policy, select Full access to allow all operations by all principals on all resources over the VPC endpoint. If you want to go with custom services, use the policy creation tool to generate the custom policy and apply here
12. (Optional) To add a tag, choose Add new tag and enter the tag key and the tag value
13. Choose Create endpoint

14. Back to VPC console and check the progress of VPC endpoint creation

Next, lets setup the Backup Gateway and establish the connection between AWS Connected account and on-premises
CREATING A BACKUP GATEWAY

2. In the left navigation pane, under the External resources section, choose Gateways

3. Choose Create gateway

4. Download OVF template from the create gateway wizard. Follow the instructions on the prompt to deploy the Backup Gateway appliance in SDDC

5. Login to VMware on AWS SDDC console
6. Create a network segment for backups(recommended) and create a group.
a) Navigate to Software-Defined Data Centers (SDDC) and select the SDDC where you have deployed the backup gatewayb) Select Networking & Security tabc) In the Networking & Security, under Networks, select “Segments” and Add Segment

d) Specify a segment Type and fill in the required configuration parameters. Set the IP assignment configuration to DHCP to have IPs assigned automatically
e) Click SAVE to create or update the segment.f) In the Networking & Security, under Inventory – select “Groups” and navigate to “Management Groups”g) Add Group, provide a name and Set Members to the CIDR of your backup segment

h) Now navigate back to the Networking & Security, under Inventory – select “Groups” and select “Compute Groups”i) Add Group, provide a name and Set Members to the CIDR of your backup segment and your local network IP address/subnet from where you will register backup gateway

7. Add Management Gateway Firewall Rules
1. On the Networking & Security tab, click Gateway Firewall

2. On the Gateway Firewall card, click Management Gateway, then click ADD RULE and give the new rule a Name
3. Enter the parameters for the new rule – the Source should the Group created for backup segment and destination should be the vCenter and the ESXi
4. In services drop-down, select Provisioning & Remote Console, HTTPS of ESXi, and HTTPS for the vCenter
5. Click PUBLISH to create the rule
8. Add Compute Gateway Firewall Rules
1. On the Networking & Security tab, click Gateway Firewall.2. On the Gateway Firewall card, click Compute Gateway, then click ADD RULE and give the new rule a Name.3. Enter the parameters for the new inbound rule – the Source should be the Group created for your local network IP address/CIDR and destination should be the backup segment group. Allow port 80 and 443.

4. Enter the parameters for the new outbound rule – the Destination can be “Any” (If you want to drill down the outbound traffic, the set the source to be backup segment group and destination to AWS, DNS Server, AWS Support and NTP Server. Allow port TCP 443, UDP 53, TCP 22 and UDP 123.5. Click PUBLISH to create the rule
9. Once the Backup gateway appliance is deployed and powered ON, complete the following steps:
1. Return to the AWS Console, In the Gateway connection section, type in the IP address of the gateway.
1. To find this IP address, go to the vSphere Client.2. Select your gateway under the Summary tab.3. Copy the IP address and paste it in the AWS Backup console text bar

2. In the Gateway settings section,
1. Type in a Gateway name.2. Verify the AWS Region. ( choose the right region to avoid cross regional data charges)3. Choose Endpoint type as VPC hosted4. Select VPC endpoint ID5. From the dropdown select the Backup endpoint which we created in the previous task

3. [Optional] In the Gateway tags section, you can assign tags by inputting the key and optional value. To add more than one tag, click Add another tag.4. To complete the process, click Create gateway, which takes you to the gateway detail page
In our next post we see how to add the Hypervisors, backup plan, Backup vaults and Backup rules. Stay tuned.